- Published on
IBM Kubernetes Service (IKS) - Cluster Creation and App Deployment
- Authors
- Name
- Ben
- @hanancs


IBM Kubernetes Service (IKS): Cluster Creation and App Deployment
A step-by-step guide for deploying your applications on IBM’s managed Kubernetes solution.

Create a Cluster on IKS.
1. Navigate to the Kubernetes Service:
- Click the Navigation Menu in the top navigation bar.
- Click “Kubernetes”

2. Click “Create cluster”:
- On the Kubernetes Service page, click on the “Create a cluster +” button.

3. Configure Cluster Details:
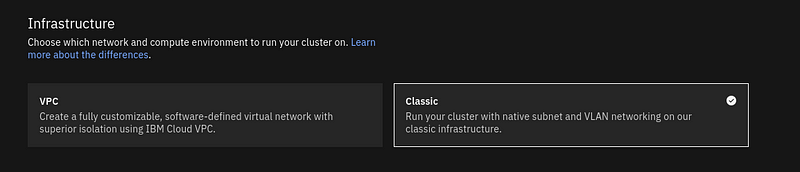
- Infrastructure: When creating your IBM cluster, you have two infrastructure options (Choose either Classic or VPC):
- Classic: Simpler setup with less customization. Worker nodes are public by default, making them easier to access but potentially less secure. A good choice for basic setups or if you need to connect with legacy IBM Cloud resources.
- VPC (Virtual Private Cloud): Offers more control over your network. Worker nodes reside within a private network, giving you greater security and customization in how you manage traffic and connections. Ideal for complex networking needs or when heightened security is a priority.
Choose the best networking option for your application
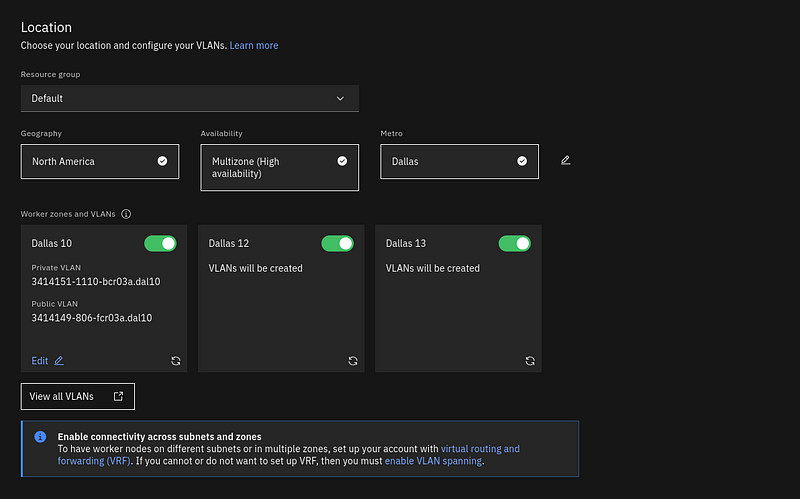
- Location: Select the geographic region closest to your primary user base for optimal performance.
- Availability: Choose between standard (single zone) or multi-zone (for high availability). Multi-zone clusters will have worker nodes spread across different datacenters.
- Version: Select the Kubernetes version you want to use.

- Worker pool:
- Name: Provide a name for your worker pool.
- Worker node flavor: Choose a flavor that provides the appropriate computing resources (CPU, memory) for your workloads.
- Worker nodes: Specify the number of worker nodes you want.
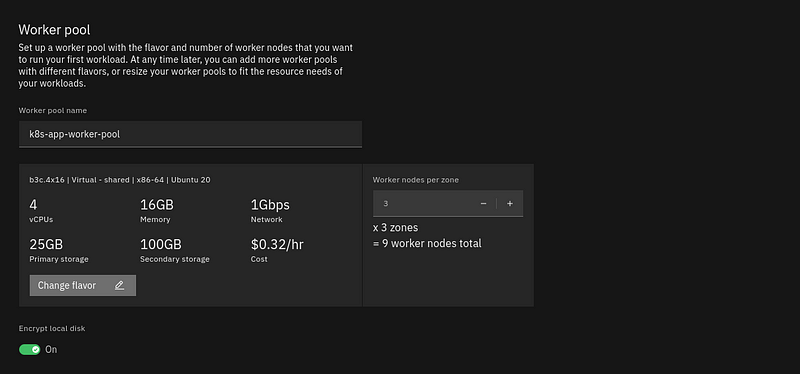
- Encryption: (Optional) Select the encryption type.
- Add Labels: (Optional) Tag your worker pool with labels if needed.
Network Settings:
- VPC: Select the Virtual Private Cloud (VPC) in which you want to create the cluster. IKS now uses VPC infrastructure by default for better security.
- Subnets: Choose the desired subnets within your VPC.
- Public Endpoint: Enable if you need your cluster to be accessible from the public internet.
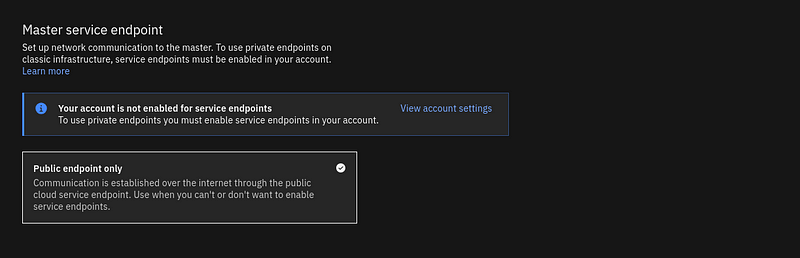
Master Service Endpoint:
- Choose between enabling a public and private service endpoint, or private only. This controls how your applications in the cluster can be accessed.
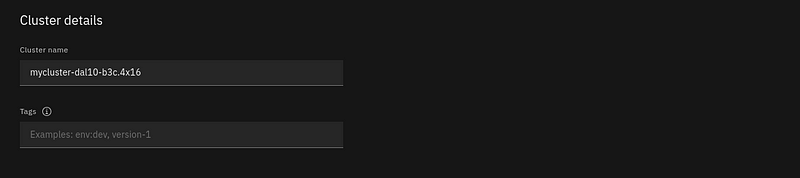
- Cluster details: Give your cluster a meaningful name.
- Tagging: (Optional) Add tags to your cluster for better organization and management.
Review and Create:
- Carefully review your cluster configuration settings.
- Click “Create cluster” to start the provisioning process.
Deploy a Containerized App to IKS
To establish cluster access (ensure you have installed the ibmcloud and kubectl CLIs):
- Log in to IBM Public Cloud:
ibmcloud login --apikey <API_KEY> -g <RESOURCE_GROUP> -r <REGION>
Connect to the IKS instance:
ibmcloud ks cluster config --cluster <CLUSTER_NAME>
Verify cluster context:
kubectl config current-context

Use get-context to list all the clusters
Create the deployment:
kubectl create deployment <DEPLOYMENT_NAME> --image=<IMAGE>
Check application status:
kubectl get pods

Ensure Deployment is Running: Use kubectl get allto confirm everything is okay.
Expose the Deployment: Execute the following command to create a NodePort service, allowing access to your application:
kubectl expose deployment <DEPLOYMENT_NAME> --type="NodePort" --port=<PORT_YOUR_APPLICATION_LISTENS_ON>
Retrieve the NodePort: Inspect the service details to find your assigned NodePort:
kubectl get svc <DEPLOYMENT_NAME>
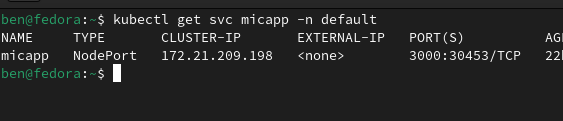
The NodePort will be listed under the “PORT(S)” column.
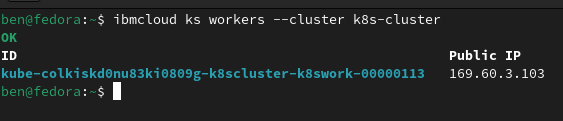
Obtain a Worker Node’s Public IP: Use the IBM Cloud CLI to list your cluster’s worker nodes:
ibmcloud ks workers --cluster <CLUSTER_NAME>
Access Your Application: Open a web browser and navigate to http://<public-IP>:<nodeport>. Replace <public-IP> and <nodeport> with the values you obtained.
Example: If your worker node’s public IP is 169.57.3.103 and the NodePort is 31456, you’d access your application at http://169.57.3.103:31456
That’s it! Your application is now accessible from the internet.
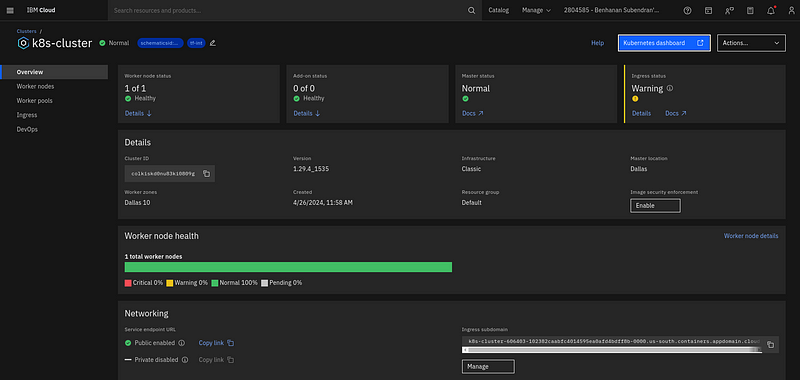
Cluster Overview at IKS
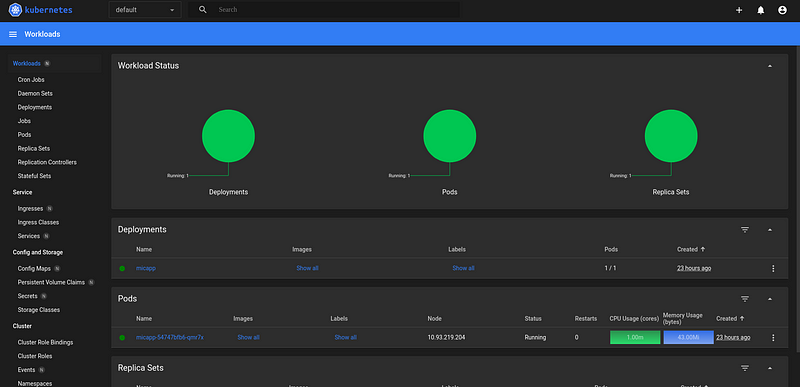
Kubernetes Dashboard via IKS
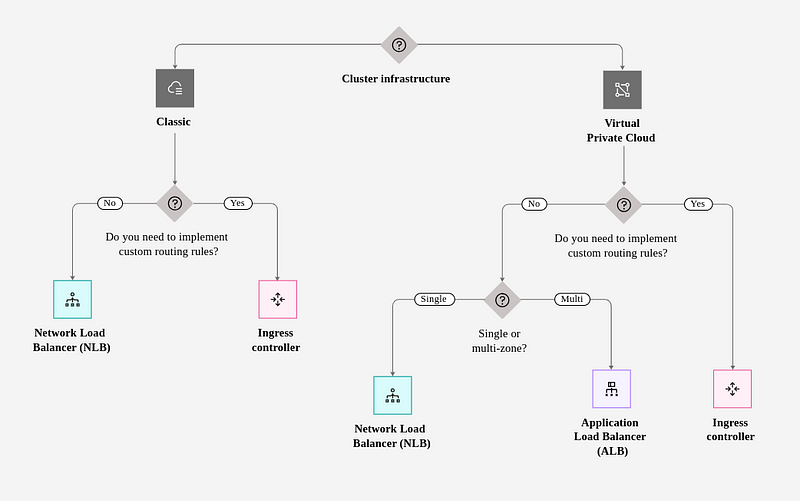
Using NodePort to expose is okay for instant demos to your clients or testing purposes. But for production-grade deployments, it’s highly recommended to have one of the following based on your requirements:
LoadBalancer: Provides an external IP address that automatically routes traffic to your service across healthy nodes. Ideal for scenarios where:
- You need public access to your service.
- You want automatic load distribution across multiple instances.
- Your cloud provider supports LoadBalancer integration with Kubernetes.
Ingress: A more sophisticated way to route external traffic, often based on URLs or paths. Ideal for scenarios where:
- You need to expose multiple services under a single IP address.
- You need advanced routing rules (e.g., routing based on domain name).
- You require TLS termination for secure communication.
Why NodePort might not be suitable for production:
- Port Range Restrictions: NodePorts operate within a limited range (typically 30000–32767), creating potential conflicts.
- Manual Traffic Management: You’ll need external mechanisms to direct traffic to the correct NodePorts, adding management overhead.
- Node Dependency: If a node goes down, services exposed on its NodePorts become inaccessible.
- Limited Scalability: Adding more nodes doesn’t automatically distribute load across service instances.